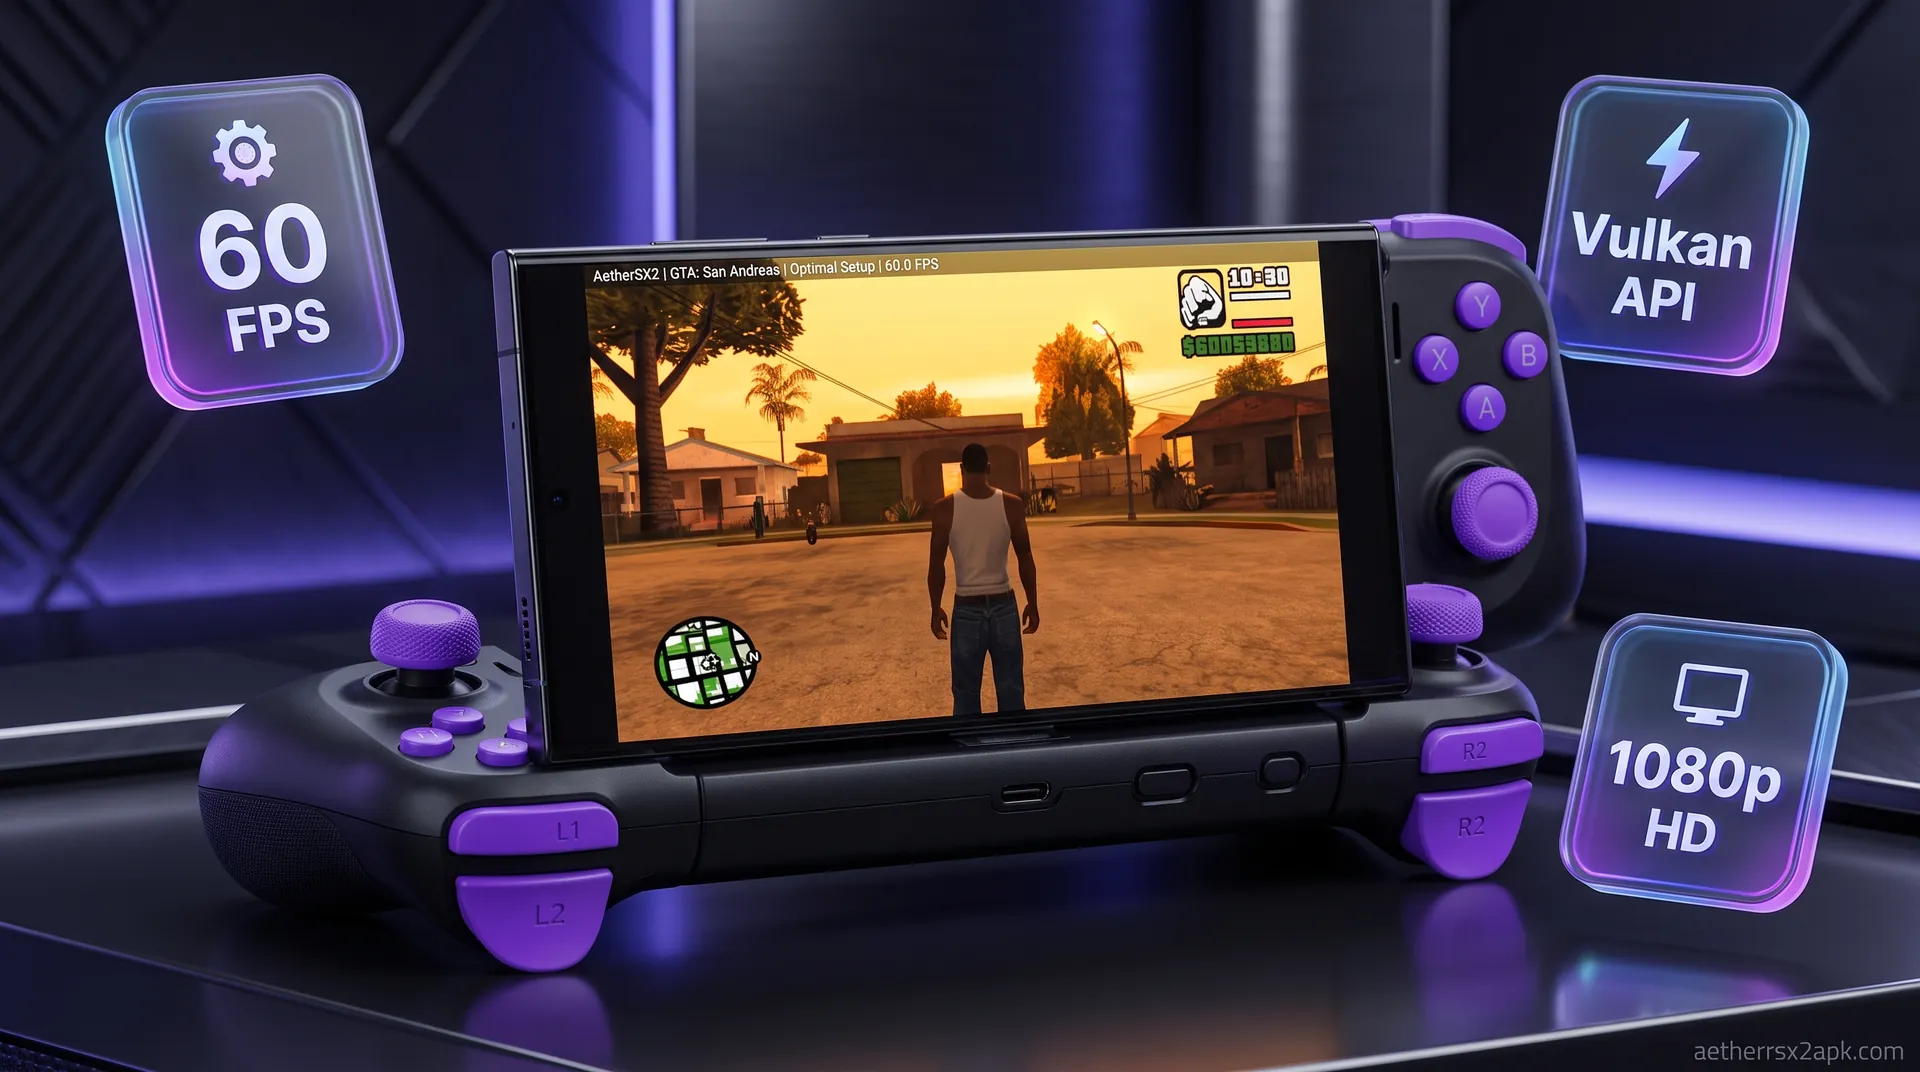
aethersx2 gta san andreas
GTA San Andreas AetherSX2 Optimal Setup
By HBKPublished Last updated
Tested on: POCO F3 (Snapdragon 870), Android 13, AetherSX2 v1.5-4248
Quick summary
GTA San Andreas on AetherSX2 is a streaming + GPU title. 2x Vulkan holds on an 870 in the countryside; Los Santos hitching is usually microSD or texture preload Full, not the dump.
- Resolution: 2x mid-range, 3x flagship if heat allows
- Haze / bloom: lower extra GS dumps before EE underclock
- Storage: CHD on internal UFS; ISO on Class 10 SD hitches in cities
- Native Android port: different game; this page is the PS2 disc
Grand Theft Auto: San Andreas is arguably one of the greatest video games ever made, and its original PlayStation 2 release is where millions of players first experienced the sprawling state of San Andreas. While Rockstar Games has released official native ports for mobile devices, many purists argue that the original PS2 version remains the definitive way to play. Thanks to the power of AetherSX2, the premier PS2 emulator for Android, you can now experience the authentic PS2 release of GTA San Andreas right on your smartphone.
However, emulating a massive open-world game like GTA San Andreas on mobile hardware is incredibly demanding. If you just boot up the game with default settings, you might encounter frame rate drops during intense shootouts, audio stuttering in bustling city sections, or weird graphical glitches like broken heat haze effects. This comprehensive guide will walk you through the absolute best AetherSX2 settings for GTA San Andreas, ensuring you get a smooth, visually stunning, and authentic experience on your Android device.
Why Play PS2 GTA San Andreas on AetherSX2 vs Android Native Port?
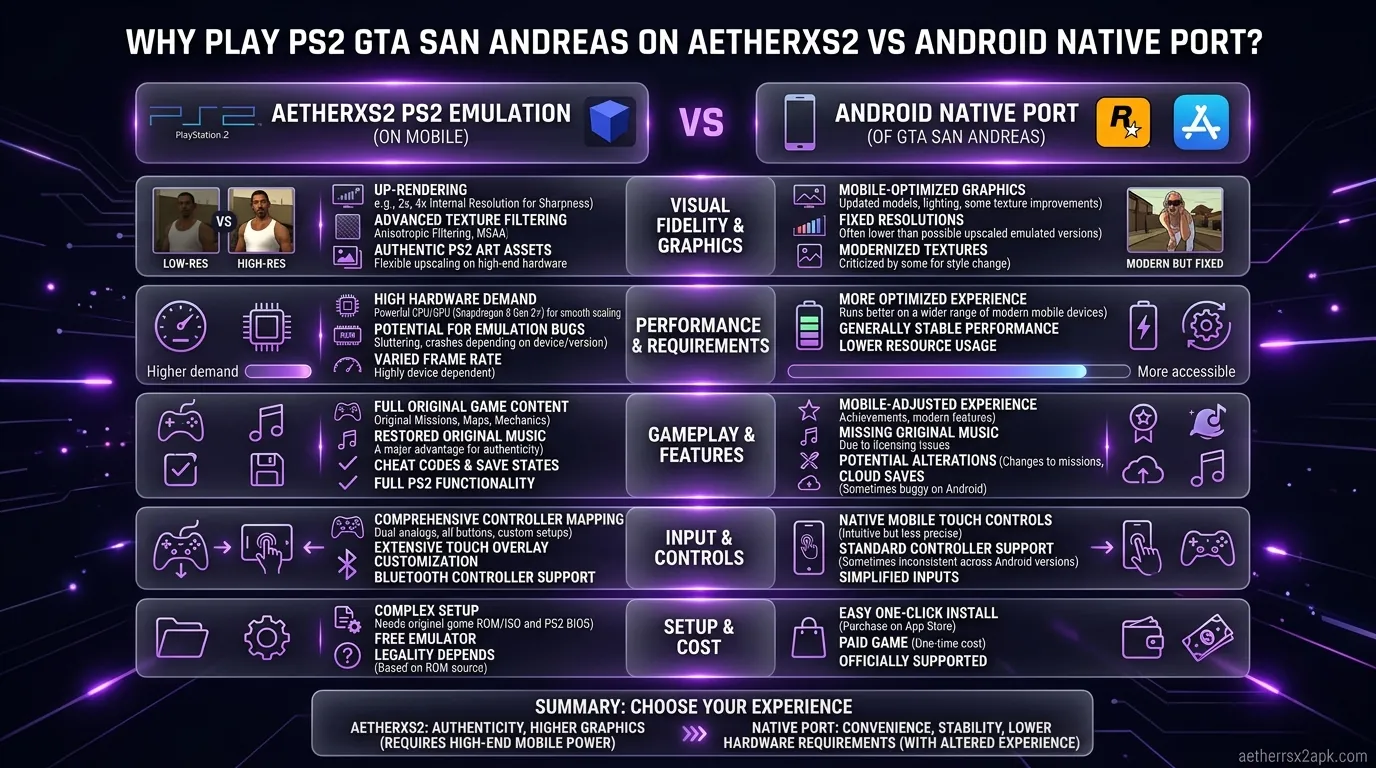
Before diving into the technical settings, a common question arises: Why bother emulating the PS2 version of GTA San Andreas when you can just download the native Android port from the Google Play Store or Netflix Games? The answer lies in the atmosphere, aesthetics, and pure nostalgia of the original release. The PS2 version has several unique characteristics that were lost or altered in subsequent ports and the "Definitive Edition" remasters.
The Original Color Grading and Atmosphere
The most striking difference between the PS2 original and modern ports is the color grading. The PS2 version utilizes a heavy, localized color filter that gives each city its distinct vibe. Los Santos features a smoggy, warm orange hue reminiscent of 1990s Los Angeles cinema. San Fierro has a cool, foggy blue tint, while Las Venturas boasts a hazy, sweltering yellow-brown filter. Modern ports largely removed these filters, resulting in a cleaner but ultimately sterile visual presentation that loses the cinematic feel of the original game. Emulating the game on AetherSX2 preserves these iconic visual styles perfectly.
Superior Weather Effects and Lighting
The PS2 hardware allowed Rockstar to implement specific rendering tricks for weather and lighting that didn't translate well to mobile or PC ports. For example, the PS2 version features an incredibly dense, volumetric fog that realistically obscures distant geometry and blends seamlessly with the skybox. The native Android port often renders fog poorly or removes it entirely, exposing the edges of the map and ruining the illusion of a massive world. Furthermore, the way car headlights reflect on wet roads during rainstorms in the PS2 version is unmatched by the mobile ports.
Unaltered Soundtrack
One of the biggest tragedies of modern GTA re-releases is the removal of iconic songs due to expired licensing agreements. The native mobile ports and recent remasters are missing dozens of classic tracks from stations like Radio Los Santos, K-DST, and Radio X. By playing an ISO backup of your original PS2 disc on AetherSX2, you get to experience the complete, unaltered soundtrack exactly as you remember it from 2004.
Physics and Animation Quirks
The physics engine in the original PS2 release behaves slightly differently than in modern ports. Certain glitches, speedrunning tricks, and vehicle handling nuances are exclusive to the PS2 engine. For players looking to revisit the game exactly how it felt two decades ago, or for those interested in classic speedrunning routes, the AetherSX2 emulation route is essential.
For more recommendations on classic titles to play, check out our guide on the best PS2 games for Android.
Recommended AetherSX2 Settings for GTA San Andreas
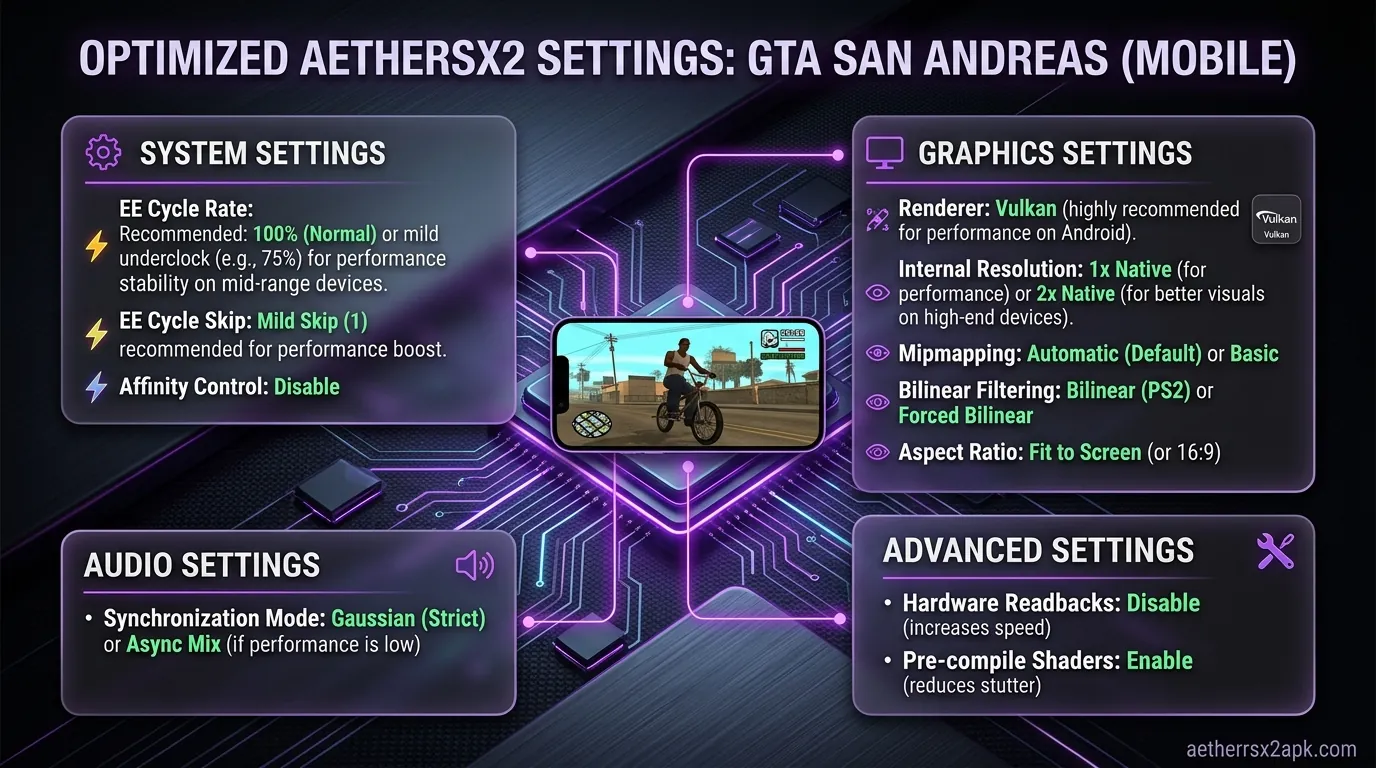
To get GTA San Andreas running smoothly on your device while maximizing its visual potential, you need to configure AetherSX2 correctly. Keep in mind that performance will vary wildly depending on your device's chipset. A high-end Snapdragon 8 Gen 2 will handle this game effortlessly, while mid-range MediaTek or Exynos chips may struggle in certain areas.
Here are the optimal settings for balancing performance and graphical fidelity.
System Settings
The System tab controls how the core PS2 hardware is emulated. For GTA San Andreas, the default settings are mostly fine, but a few tweaks can help stabilize the frame rate.
- EE Cycle Rate (Underclocking): Leave at
100% (Normal)for high-end devices. If you are experiencing general lag, you can try reducing this to75% (-1)or50% (-2). However, be warned: underclocking the EE in GTA San Andreas can cause the game's internal speed to slow down, making CJ move like he's underwater. It is generally better to fix lag via graphics settings rather than EE underclocking for this specific game. - EE Cycle Skip: Leave at
0 (Normal). Skipping cycles in GTA games almost always results in severe audio desync and choppy gameplay. - Affinity Control: Set to
Performanceto force AetherSX2 to utilize your device's high-performance CPU cores. - Multi-Threaded VU1:
Enabled. This is crucial for multi-core Android processors and provides a massive speed boost in open-world environments. - Fast CDVD:
Enabled. This speeds up the notoriously long loading screens when transitioning between islands or entering interiors.
Graphics Settings (Renderer)
The Graphics tab is where you will make the most impactful changes to both performance and visual quality.
- GPU Renderer: Select
Vulkan. For the vast majority of modern Android devices, Vulkan provides significantly better performance and lower overhead than OpenGL, especially for demanding games like GTA SA. If you experience major graphical glitches (such as missing textures), switch back toOpenGL, but expect a performance hit. - Upscale Multiplier: This determines the rendering resolution.
- High-end devices (Snapdragon 8 Gen 1/2/3):
3x Native (1080p)or even4x Native (1440p). The game looks incredibly crisp at these resolutions. - Mid-range devices:
2x Native (720p). This is the sweet spot for a sharp image without tanking performance. - Low-end devices:
1x Native (PS2 Resolution). If you are struggling to maintain 60FPS, you must stick to the original resolution. - Bilinear Filtering:
Bilinear (PS2). This mimics the authentic texture smoothing of the original console. - Anisotropic Filtering: Set to
4xor8x. This setting requires very little processing power on modern GPUs but makes a massive difference in how road textures and distant objects look at sharp angles. It prevents textures from looking blurry in the distance. - Mipmapping: Set to
Full (Slow). Mipmapping is essential for GTA San Andreas. If this is disabled or set to Basic, you will notice severe texture shimmering and moiré patterns on roads, buildings, and chain-link fences. - Trilinear Filtering:
Enabled. This helps smooth out the transitions between mipmap levels.
Fixing Frame Rate Drops in Heavy Cities
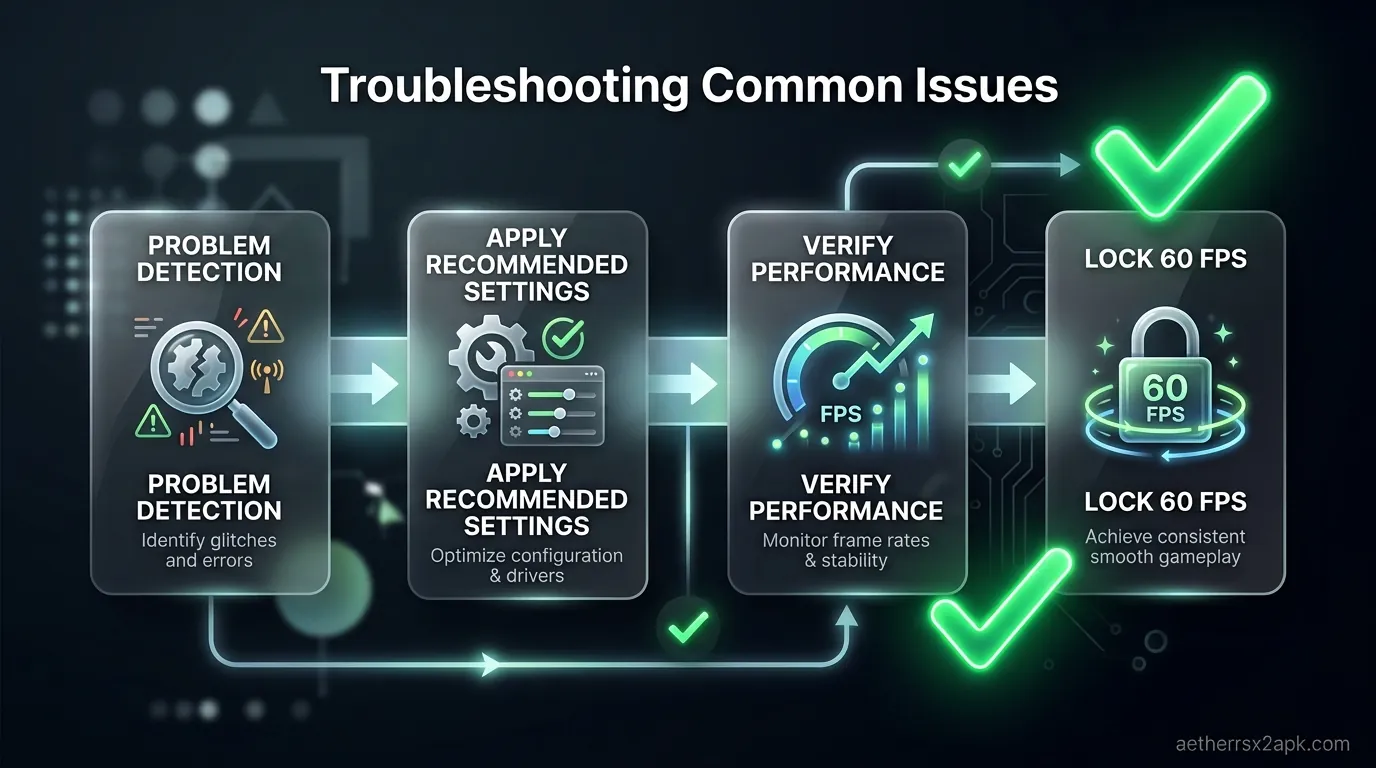
Even on powerful devices, GTA San Andreas can suffer from sudden frame rate drops, particularly in densely populated areas like downtown Los Santos or the bustling Strip in Las Venturas. The game's engine heavily taxes the CPU when processing AI for dozens of pedestrians, vehicles, and complex geometry simultaneously. Here is how to mitigate these specific slow-downs.
The CPU Bottleneck
When you drive rapidly through a crowded street, the emulator has to load new map chunks, spawn AI, and calculate physics all at once. This often maxes out the CPU, causing a stutter.
- Reduce Internal Resolution Temporarily: If you only experience lag in specific locations, your GPU might be bottlenecking. Try dropping the Upscale Multiplier down one notch (e.g., from 3x to 2x) to see if the stutter disappears.
- Hardware Download Reads: In the Advanced Graphics settings, look for
Hardware Download Reads. Setting this toDisable (Ignore)can sometimes provide a small performance bump in heavy areas by skipping certain visual feedback loops, but it might break specific visual effects. - Disable Readbacks: Similarly,
Disable Readbackscan improve performance by preventing the GPU from sending data back to the CPU, but use this with caution as it can cause graphical errors in some cutscenes.
Audio Stuttering Fixes
Frame rate drops in GTA San Andreas are almost always accompanied by horrible audio stuttering or slow-motion sound effects.
- Audio Interpolation: In the Audio settings, change the interpolation mode to
GaussianorLinear. The defaultCatmull-Romis highly accurate but more demanding. - TimeStretch: Ensure
TimeStretchis enabled in the Audio settings. This prevents the audio from popping and cracking when the frame rate dips below 100%, stretching the sound slightly to match the video output.
If you are consistently struggling with performance across multiple games, consult our game compatibility database to see how other users have configured their settings for specific titles.
Heat Haze & Graphic Glitch Fixes
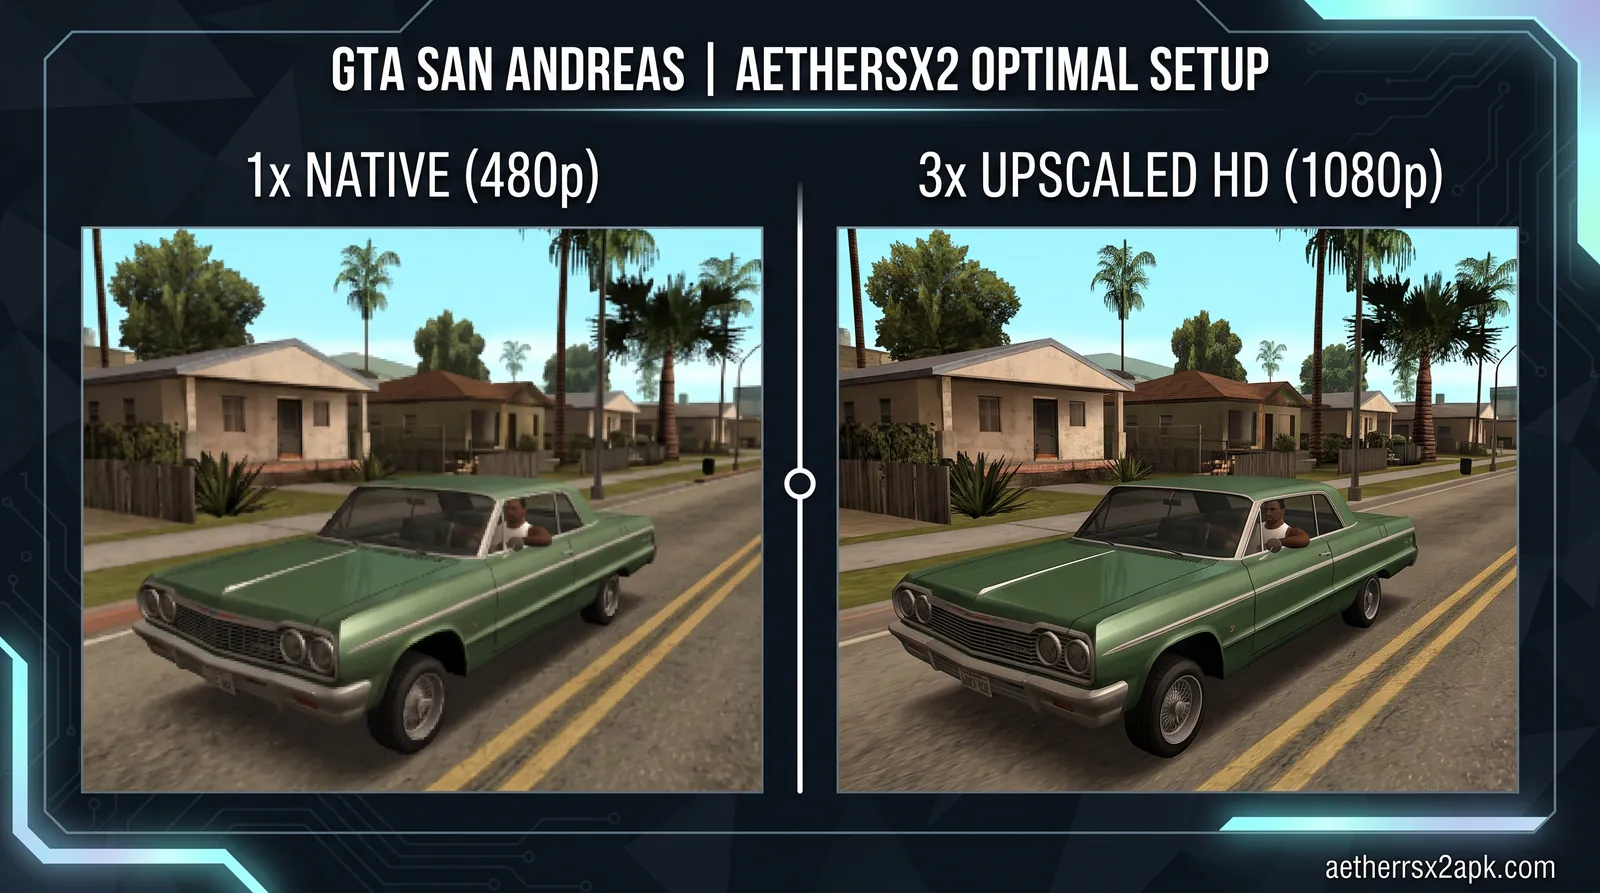
GTA San Andreas on PS2 heavily utilizes a distinct "heat haze" effect. When driving fast or flying, the air around the exhaust and in the distance shimmers to simulate hot air. Emulators historically struggle with this effect, leading to a blurry, ghostly image covering the entire screen, or severe performance drops.
Fixing the "Ghosting" or Blurry Screen Effect
If your screen looks like it has double-vision or excessive motion blur, this is the emulator failing to render the heat haze effect correctly.
- Skip Draw (Advanced Settings): In the Advanced settings tab, look for the
Skip Drawoption. Setting Skip Draw Start to1and Skip Draw End to1can sometimes remove the broken post-processing effect entirely. While you lose the heat haze, the game becomes crystal clear and runs faster. - Half-Pixel Offset: If you are using an Upscale Multiplier above 1x, the game's post-processing effects might not align perfectly with the geometry, causing a blur. In Advanced Graphics, set
Half-Pixel OffsettoNormal (Vertex). This realigns the upscaled image with the internal post-processing grid. - Texture Preloading: Set Texture Preloading to
PartialorFull. This can help eliminate stuttering caused by the game loading new textures as you drive around corners, which can sometimes manifest as graphical glitches.
CRC Hack Level
The CRC (Cyclic Redundancy Check) Hack Level is a setting that specifically disables known problematic visual effects in certain games to improve performance or fix glitches.
- Setting: Go to Graphics ->
CRC Hack Level. - Recommendation: Set this to
Aggressive. For GTA San Andreas, the aggressive CRC hack level disables some of the more broken fog and heat effects that AetherSX2 struggles to render accurately at higher resolutions, resulting in a cleaner image and better frame rates.
Controller Mapping for GTA San Andreas
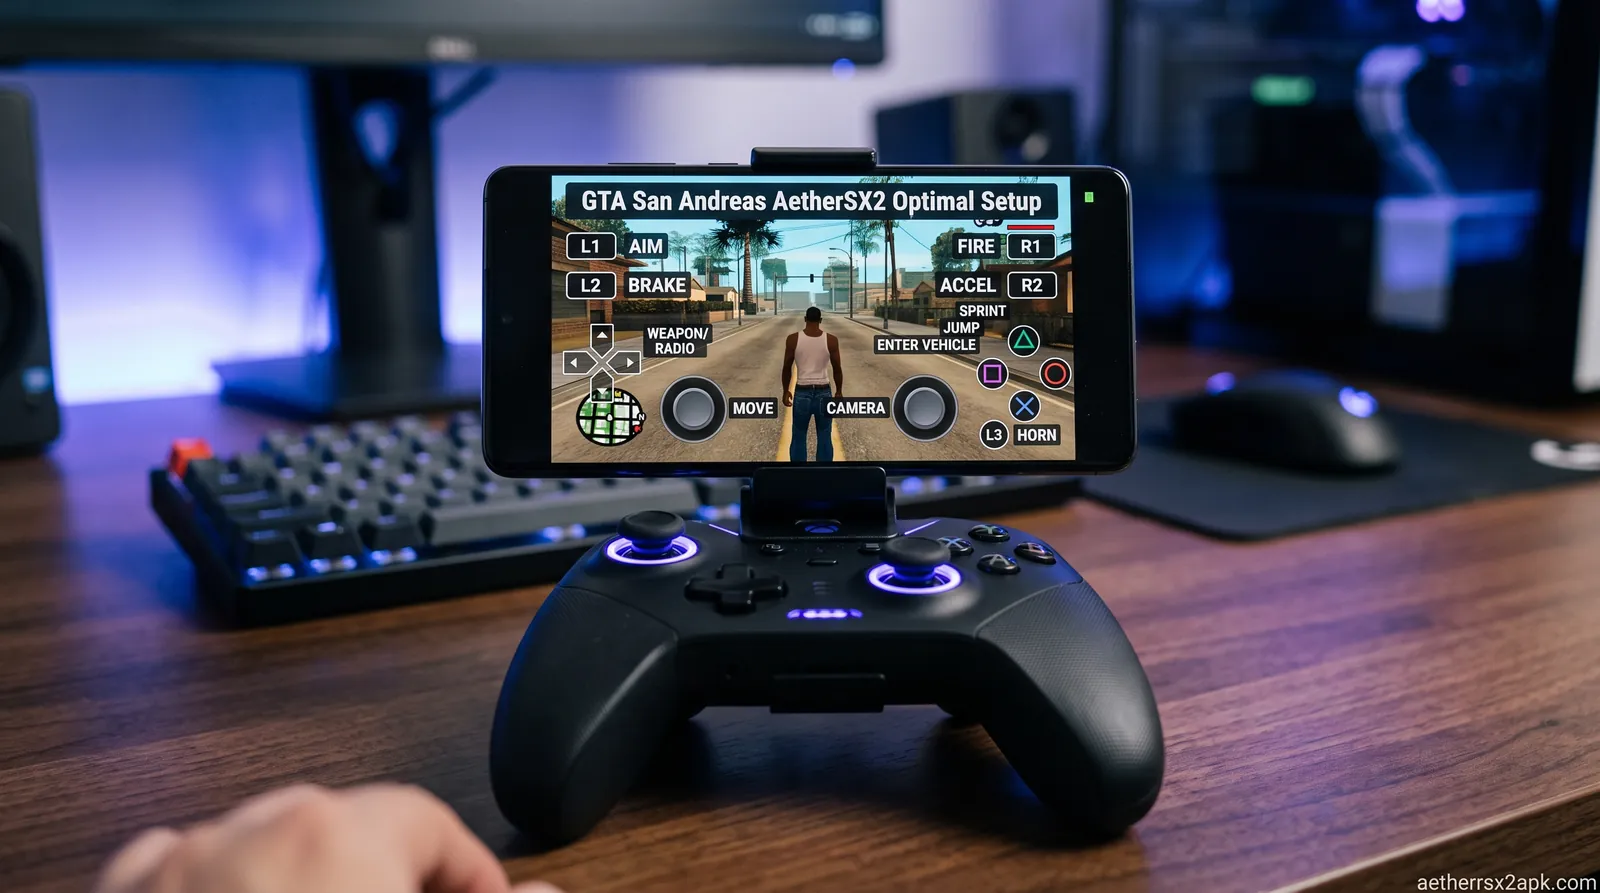
GTA San Andreas was designed for the DualShock 2 controller. Its control scheme is incredibly complex, utilizing every single button, including the pressure-sensitive face buttons (a feature rarely found on modern controllers). Playing with touch controls is possible but notoriously difficult, especially for flying missions like the infamous "Supply Lines..." or "Freefall."
Using a physical Bluetooth controller is highly recommended. For detailed instructions on connecting and mapping controllers, see our comprehensive AetherSX2 controller setup guide.
Classic PS2 Layout Mapping
To recreate the authentic PS2 experience, you should map your controller (like an Xbox or PlayStation controller) exactly to the original layout.
- Left Analog Stick: Movement / Steering
- Right Analog Stick: Camera control / Turret aiming
- D-Pad Up/Down/Left/Right: Used for various functions like interacting with menus, responding to gang members, and radio station tuning.
- Cross (A on Xbox): Sprint / Accelerate (Bicycles)
- Square (X on Xbox): Jump / Brake/Reverse (Vehicles)
- Circle (B on Xbox): Attack / Fire weapon
- Triangle (Y on Xbox): Enter/Exit vehicle
- L1 (LB): Radio Station Next / Secondary Attack
- L2 (LT): Look Left (Vehicle) / Change Weapon Left
- R1 (RB): Lock-on target / Handbrake
- R2 (RT): Look Right (Vehicle) / Change Weapon Right / Accelerate (Vehicles)
- L3 (Left Stick Click): Crouch / Horn
- R3 (Right Stick Click): Look Behind
The Pressure-Sensitive Acceleration Issue
The original PS2 version of GTA San Andreas used the Cross (X) and Square buttons for acceleration and braking, and these buttons on the DualShock 2 were pressure-sensitive. The harder you pressed, the faster you went. Modern controllers (except for a few specific models) do not have pressure-sensitive face buttons.
The Fix: When mapping your controls in AetherSX2, ensure that you are mapping the face buttons as standard digital inputs. AetherSX2 will register a press as a 100% full press. This means you will always accelerate at maximum speed when pressing the button. While you lose the nuance of analog speed control, it makes the game perfectly playable on modern gamepads.
Alternatively, some players prefer to remap the vehicle acceleration and braking to the analog triggers (R2/RT and L2/LT) to regain analog speed control, though this deviates from the classic PS2 control scheme and requires getting used to.
City streaming and heat-haze are documented on the PCSX2 wiki GTA San Andreas page. Source: PCSX2 GitHub. Android city-lag reports: r/EmulationOnAndroid.
Frequently Asked Questions
1. Where can I download the GTA San Andreas PS2 ROM (ISO)? For legal reasons, we cannot provide links to download commercial game ROMs or ISOs. You must create an ISO backup from your legally purchased copy of the original PlayStation 2 game disc using a PC DVD drive and software like ImgBurn. For info on the BIOS file required, see our AetherSX2 BIOS guide.
2. Why is my game running in slow motion? Slow motion is usually caused by the device's CPU or GPU failing to maintain the required frame rate. Ensure you are using the Vulkan renderer, lower your Upscale Multiplier to 1x or 2x, and make sure Multi-Threaded VU1 is enabled in the System settings. Avoid aggressive EE underclocking for this specific game.
3. How do I fix the black screen after the Rockstar logo? A black screen during boot is often related to an incompatible BIOS file or a corrupted ISO. Ensure you have dumped a valid PS2 BIOS from your own console and placed it in the correct AetherSX2 directory. Also, try enabling the Fast CDVD option in the system settings. Head back to the emulator setup walkthrough if you need a refresh on first-time install.
4. Can I use cheat codes in the AetherSX2 version of GTA San Andreas? Yes! You can use cheat codes in two ways. You can manually input the classic button combinations on your controller just like on a real PS2. Alternatively, you can use AetherSX2's built-in patch system to load .pnach cheat files for widescreen hacks or infinite health.
5. Why are the roads flickering or turning black in the distance? This is a classic symptom of disabled Mipmapping. Go to your Graphics settings and ensure that Mipmapping is set to Full (Slow). This is essential for rendering distant textures correctly in GTA San Andreas.
6. Does the AetherSX2 version have multiplayer? The original PS2 version of GTA San Andreas featured a limited local co-op multiplayer mode (indicated by a two-player icon floating in certain locations on the map). You can play this mode on AetherSX2 by connecting a second Bluetooth controller and mapping it to "Port 2" in the emulator's controller settings. However, there is no online multiplayer functionality.
Conclusion
Playing Grand Theft Auto: San Andreas on AetherSX2 is a fantastic way to experience this legendary game in its purest, original form. By carefully configuring your renderer, managing your upscaling settings, and applying the right graphical fixes, you can transform your Android device into a portable PlayStation 2 capable of running this massive open world flawlessly. Remember to start at 1x or 2x resolution and slowly work your way up to find the perfect balance between visual fidelity and a rock-solid 60FPS on your specific hardware.